

Aug
1, 2003

Sharpening
is easy to understand at the simplest levelgiven two digital photos, one
sharpened and one not, youll always point to sharpened one as having more
detail and being better focused. Yet, if you were confronted with two sharpened
photos, one well done, and the other less so, you might not be able to differentiate
between the two.
Unfortunately,
most digital photographers have learned sharpening by fixed rules that specify
exact values to use in Photoshop's filters, and therefore neither understand
why they use the tools they do, or how they might be using them rightly or
wrongly. This article attempts to clarify the problems created by digital
imaging, and how to apply the correct amount and type of sharpening to fix
them.
Why
Is Sharpening Necessary?
The
nasty truth underlying all digital recording techniques is that they turn
analog signals into discrete samples of the original. CD players, for
example, sample sounds at 44 kilohertz (i.e., 44 thousand times a second)
and record each sample using 16 bits of data. The frequency of digital sampling
and the amount of data sampled determine how well the analog original can
be reproduced. The coarser the sampling, the less the digital recording is
like the original.
State
of the art consumer digital cameras have a sampling frequency of 4500 by 3000
pixels (e.g., Kodak Pro 14n), with the amount of data recorded being 12 bits
for each of the red, green, and blue colors. These numbers are actually relatively
crude compared to the analog reality, where detail and color variations are
nearly infinite. The real world sports an infinite number of shades of blue
in the sky and an endless amount of detail, but your digital camera only captures
between 1000 and 4500 pixels of horizontal detail in perhaps thousands of
shades of possible blues. While thats pretty darn good, it does cause two
resolution-oriented problems:
- Detail
smaller than the pixel size is usually lost.
- Where transitions
between details occur within the area of a single pixel, the transition
usually results in a digital value that is neither of the original values.
This second problem
is what makes details in your photographs look fuzzy. The classic example
is that of a diagonal transition line that transects a pixel. The pixel can
either be white, black, or some in between value. If the camera were to render
the pixel as entirely white or black, then youd see an artifact known as
the stairstep, so named because a diagonal line gets rendered as a series
of pixel blocks that resemble a set of two-dimensional stairs. The alternative
is to record the pixel as an "in-between" gray (which still produces
a bit of a stairstep effect, but isn't quite as obvious). Neither case is
correct, and both tend to reduce apparent sharpness.
All digital cameras
use in-camera interpolation to detect edge transitions, and use some form
of digital sampling to create in-between values for those diagonal lines.
The result? Instead of a precise transition from one pixel value to another,
diagonal details (and sometimes small horizontal and vertical details) are
rendered as a more gradual transition from one color to another. Our brains
have been programmed to see blurry or soft edges as being out-of-focus, thus
unmodified digital photographs always tend to look just a tad soft. Thats
even true of higher resolution cameras and scannersfilm images Ive had scanned
on 4000 dpi drum scanners still look a little soft in the detail areas.
Worse still,
most digital cameras employ what is known as an anti-aliasing filter--essentially
a diffusion filter over the sensor. (The exception is the Kodak Pro 14n).
Why? Because the Bayer pattern sampling used in digital cameras has a tendency
to produce colored artifacts and moire patterns on small detail. By blurring
the light slightly so that multiple photosites get some of the information
from a particular detail, this lessens the chance that these hard-to-remove
artifacts appear. Unfortunately, it also has a further tendency to make edges
less distinct.
The
method by which most digital photographs are corrected is to apply a sharpening
filter using an image-editing program, such as Photoshop. What these filters
do is to detect transitions (edges) and make them more pronounced. The easiest
way to see this is to use two gray blocks:
- Open
your image editing program and create two adjacent gray blocks (it doesnt
matter what size). The lefthand block should have the RGB value of 86, 86,
86 (in Photoshop, doubleclick on the foreground color in the tool palette,
then enter those values directly into the RGB section of the Color Picker
that appears). The righthand block should have the RGB value of 43, 43,
43. Be sure that these blocks touch one another, and that youve turned
off any anti-aliasing options in the tools you used to create them.
- Zoom
way in on your image (500-1000%). You want to see the transition line between
the two blocks clearly, so place it in the middle of your window.
- Use
the Sharpen filter (in Photoshop: Filter->Sharpen->Sharpen).

Note
how the software lightened a single pixel column on the light gray side and
darkened a single pixel column on the dark gray side (just each side of the
cursor in the image, above). Essentially, the transition is being exaggerated.
At this close view, your eye can easily see the change, but now select Actual
Pixels (View->Actual Pixels). Since you know what to look for, you can
probably still make out the light gray column (though I bet you cant see
the dark gray one, especially if your monitor has been correctly color calibrated).
Use the Undo command (Ctrl-Z in Windows, Apple-Z for Macs) to toggle back
and forth between the unsharpened and sharpened versions. The sharpened version
should indeed look sharper. (For extra credit, rotate the unsharpened version
45 degrees and repeat the sharpening step; the unsharpened version should
seem significantly softer than the sharpened version).
Okay,
now you know what to look for in sharpening: sharpened digital images have
a slight halo at edges, one that can usually only be seen by enlarging the
pixels or knowing exactly what to look for. If you performed the extra credit
assignment in the last paragraph, you also are aware that diagonal edges can
obtain interesting "artifacts" when sharpened (the vertical artifacts
are rather mild-mannered in comparison, aren't they?).
The
Unsharp Mask
For
our simple example, we used a straight Sharpen filter, which worked fine.
Unfortunately, the real world is a little more complicated than two shades
of gray with a straight-line edge between them. We need to be able to control
the amount of sharpening that is done and how it is applied, and for that
we use the Unsharp Mask. Contrary to its name, it does actually sharpen your
image. An Unsharp Mask gets its name from the fact that it applies a Gaussian
blur (the "Radius" value) on a copy of the data and then compares
the original data against the blurred data. In areas where there isn't a lot
of detail, there wouldn't be much difference (the "Threshold" value
controls how much it considers to be a significant difference), so the function
won't try to change values (changes are controlled by the "Amount"
in the Unsharp Mask settings). In areas where there was detail, the original
data and the blurred data would be significantly different, and thus the function
senses there is detail or an edge there.
Probably the
biggest problem in using the Unsharp Mask is determining how to set the three
controls (Amount, Radius, and Threshold for Photoshop users; other programs
often use different terminology, apparently so that they don't receive nasty
letters from Adobe lawyers). Most written advice Ive seen always gives one
set of starting points, then leaves the rest up to you to determine visually.
And every writers starting point seems to be different. But if you read the
last paragraph carefully, you'll already have some ideas about what these
values might be.
First,
lets get rid of one notion, that theres a magic starting place that applies
to all images. Instead, let me suggest that there are at least two starting
places, and many images need to use selections to apply different sharpening
techniques to different areas. More on that in a bit.
Next,
lets make sure you know what each of the controls refers to:
Follow
along at home: Start up Photoshop. Recreate your own simple gray block document
to match the example (above). The lefthand block should have an RGB value
of 86, 86, 86 and the righthand block a value of 43, 43, 43. If you use the
Paint Bucket tool to create the blocks, make sure that anti-aliasing is off.
You want solid blocks of a single color value.
Sharpening
makes the edge of the lighter block a lighter value of gray, and the edge
of the darker block a darker value of gray. Select Unsharp Mask
from the Filters menu and set starting values of 100
for Amount, 2 for Radius,
and 0 for Threshold.
-
Amount:
determines the aggressiveness of the "sharpening" action. With
your simple two-gray image, try amounts of 100, 200,
and 400 (make sure the Preview box is
checked in the Unsharp Mask dialog so that you see the
changes as you make them; you should also be viewing at Actual Pixels
size). What you should see is that as the amount is increased, the colors
of the new edges get more exaggerated. In other words, the light line that
gets added on one side of the boundary gets lighter with each increase,
the dark line on the other gets darker (though thats often more difficult
to see).
-
Radius:
determines how wide an area at the transition is affected. Try increasing
the Radius to 4 and 8, and youll see
that area that is modified at the transition widens. Note, too, that the
further away from the actual transition point you get, the less the Amount
is applied.
-
Threshold:
determines how much difference there must be between two adjacent pixels
before any change is made. In our simple example, youll have to enter very
high numbers before you see how this works (try 25, 50,
and 100). Note that threshold and radius interact a bit.
With a Threshold of 100 and a Radius of 1 or
less, almost nothing changes, but if you increase the Radius, youll start
to see the effect again.
Okay,
I wrote earlier that there isnt a magic starting place that applies to all
images. While thats true for Amount, both the Radius and Threshold probably
should be started at specific points:
-
Amount:
<determined picture by picture, and with some consideration to enlargement
size, if applicable>
-
Radius:
start with .5 and try to avoid going much higher, if possible.
I believe its better to apply Unsharp Mask twice with
.5 and .3 than using an initial radius
of .8. Why? Because any value larger than .5
starts to affect more than one pixel beyond the transition point, which
starts to produce more visible halos, especially if you need to use aggressive
amount values. If youre printing with an inkjet printer, the dot gain you
get from the ink spreading on the paper often masks these halos, so go ahead
and try higher values if youd like, but only if you analyze the results
from the final output (not the screen).
-
Threshold:
start with 0 and leave it there if your image is relatively
noise-free. Using any other value for Threshold applies the filter to
only parts of the image, and I believe there are better ways of handling
partial sharpening than using Threshold (see Edge Sharpening,
below). Sometimes you can get away with using modest threshold changes.
But Im starting to notice that I can detect images that have been sharpened
with the threshold set to something other than 0. Sharpening
tends to apply a film-like grain to the overall image, especially if youre
working with a digital camera or scanner that has channel noise in it (look
at the individual RGB channels for a sky area under high magnification;
are all channels smooth gradations, or is there a random pattern of darker
and lighter pixels in one or more channels?). Personally, I sometimes like
that effect, but using Threshold other than 0 tends to
make for unevenness to this grain.
Sharpening
Rules
Before
continuing, lets set some specific rules down for dealing with standard sharpening:
-
Perform
all other changes (color correction, saturation changes, distortion
corrections, etc.) before sharpening.
-
Save
a copy of the corrected, but unsharpened version. (And youve already saved
a copy of the original, right?)
-
Use
the Unsharp Mask for basic sharpening, as it provides more
control than the other related filters.
-
If
submitting to a professional designer, send the unsharpened version, as
you dont know how dot gain may change the amount of sharpening necessary.
-
If
printing on an inkjet printer, error on the side of slight oversharpening.
- Try to use a
Threshold of 0 and Radius
of .5, if possible.
Lab
Color Sharpening Using the Luminosity Data
Some
books and seminars recommend converting your document to the Lab Color space
(Image->Mode->Lab Color),
and then applying an Unsharp Mask to the Lightness channel (Click on the Channels
tab in the Layers window and make sure that Lightness
is the only channel selected before applying the filter). After youve sharpened
your image this way, you convert it back to RGB Color (Image->Mode->RGB
Color).
The
reason for using a technique like this is that sharpening colored edges means
that the Unsharp Mask uses the color data to determine how to modify the edge.
This sometimes results in minor shifts in color in the sharpened areas. But
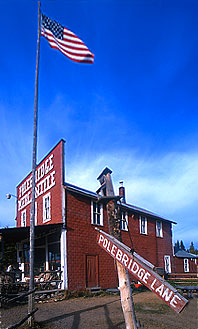
the changes are small. For example, the small blue area between the pole and
the building front in the image below shifts ever so slightly bluer when using
the Unsharp Mask on the original RGB (a value of 90, 132, 187 shifts to 107,
153, 210 using Lab Color sharpening, but to 109, 155, 213 using RGB Color
sharpening). If you arent using color profiles for all of your equipment
and attempting to maintain color matching between acquisition and print, sharpening
using only the luminosity data is probably overkill, though, as any miscalibration
between your monitor and printer likely produces a bigger shift.

If
you are minding every last little bit of color change, be aware that
changing color space introduces rounding errors in color values (and the error
is more severe in 8-bit images than in 16-bit images). That same pixel value
I noted before changes from 90, 132, 187 to 90, 133, 188 after converting
to Lab Color and back to RGB Color, without making any other changes to the
document.
While
Ive never seen a color changed in ways that I found destructive or problematic
by rounding or shifting, I have noted very subtle changes in areas of gradated
color patterns. At 1000% view I sometimes see a few random pixels shift in
sky tones when making these changes. (Best way to see for yourself: make the
adjustment from RGB Color to Lab Color and back to RGB Color. Then zoom way
in to an area that has a subtle gradation, then use the History palette to
click back and forth between the original RGB and the reconverted RGB. If
youre satisfied youre not seeing any color shifts worth worrying about,
then go ahead and use the Lab Color sharpening method.) If you do decide to
use the Lab Color method for sharpening, convert to Lab Color and back
only once. Rounding is cumulative, so bouncing back and forth between
RGB and Lab Color is a no-no!
A
better way to sharpen just the luminosity channel without changing to Lab
Color is to perform sharpening as you usually would (e.g., using Unsharp
Mask), then choose Fade Unsharp Mask from the Edit
menu. In the dialog that appears, change the Mode from Normal
to Luminosity and click on the Okay button.
Edge
Sharpening
Portrait and nature
photographers have one thing in common: we hate seeing sharpening artifacts
on large blocks of color. Any underlying noise in the image tends to bubble
up to visible, and skies or skin tones with too much detail in them don't look
as good as gently gradated ones. And if you know what bokeh is (the character
of out-of-focus areas) and care about it, you'll be particularly bothered by
what happens to noise in out-of-focus areas. Indeed, the first thing I look
at in an image to see if sharpening is detectable is the non-detailed, out-of-focus
areas. I've seen all kinds of techniques that attempt to deal with the problem
of pulling up sharpening artifacts (deselecting the continuous tone areas before
sharpening, using history brushes to paint out sharpening in certain areas,
etc.). But the following technique is my favorite. Essentially, you build a
mask of just the edges in your image, then apply sharpening to the areas under
the mask. Here's one set of steps you can use in Photoshop:
- Open your image,
as usual. Perform all your other corrections on it before sharpening, as usual.
- When you're
ready to sharpen, click on the Channels palette and create
a new channel. This new channel will eventually be your mask. Change it's
name to "Sharpening Mask."
- Click on the
RGB channel for your image.
- Select the entire
image (Select->Select All).
- Copy the entire
image (Edit->Copy).
- Click on the
Sharpening Mask channel you created in Step #2. Paste the image in (Edit->Paste).
It'll appear in black and white, but that's what we want, so don't worry.
- Use the Find
Edges filter (Filter->Stylize->Find
Edges) on the Sharpening Mask channel. It'll turn into something
that looks a bit like a line drawing. Our next steps will be to tweak this
mask.
- We want the
black to be really black and the white to be really white in our mask, so
use Levels to make the adjustment (Image->Adjust->Levels).
Move the black point in from the left, and the white point in from the right
(the triangles under the histogram). How much you do this is one of the critical
choices you'll be making, so take your time, and remember that the black areas
are what are going to be sharpened (the white areas won't be sharpened).
- We want to hide
the actual sharpening of the edges, so we need to make sure there's a smooth
transition from white to black in our mask. To accomplish this, use a small
Gaussian blur on the image (say 2-4 pixels) (Filter->Blur->Gaussian
Blur).
- Now we need
to tell Photoshop that our Sharpening Mask is just that, a mask. To do that,
we need to select the black bits only. Use Select->Load
Selection. In the dialog that comes up, make sure that Sharpening
Mask appears as the Channel and that the Invert box is checked.
- Click on the
Layers tab and make the image visible again. You should see the selection
created in Step #10 superimposed over the image.
- Get the image
ready for sharpening. Choose View->Show->Hide
Edges (Cmd/Ctrl-H) to make the selection invisible, then choose View->Actual
Pixels and scroll the image to an area with which you want to evaluate
the sharpening.
- Finally, we're
ready to sharpen. Select Filter->Sharpen->Unsharp
Mask and play with the values. Note that you can use much higher
amounts than usual, as the halos tend to fall outside the selected areas.
Radius should be a low value (.5 to 1.0),
and Threshold should be 0. If you find that the sharpened
area is too restrictive, go back to Step 8 and change your mask.
Yes, that's a lot
of steps, but you can easily make them into a Photoshop Action (make sure to
click on the icon to make Steps 8 and 13 editable during playback). This, by
the way, isn't the only way to perform an edge sharpening technique. I've seen
at least a half dozen variants on the idea of making a mask for the details,
then sharpen only at the mask.
Using
Sharpening to Change Contrast
Here's something
I hadn't noticed before. Then one day I made accidentally entered some "stupid"
values into the Unsharp Mask filter and noticed a change to the image that was
interesting. So I did some research. It seems that a number of digital cogniscenti
have been using the Unsharp Mask to make slight bumps in image contrast. It's
really quite simple to do: just select a low value for Amount (10-25%), a very
high value for Radius (200-300 pixels), and a 0 Threshold. This technique actually
produces a more likeable contrast boost, in my opinion, than does the Contrast
command. Just be sure to save a version of your image before using this technique
(it's not undoable at a later date). You also perform this action prior to doing
a "real" sharpening.


